Sendmux is an email layer that routes cold outreach through sending accounts you already own. You add each inbox, set its sender details and its per-hour and per-day caps, then create one sending key. Sendmux picks an eligible account for every message and holds anything over that account’s current cap. That makes it the send rail underneath a GTM motion. Your tools pick the targets and write the copy. Sendmux decides which inbox carries each message and how fast.
You need a Sendmux team, at least one inbox you can supply SMTP credentials for or a Gmail or Outlook account you can authorise, and a prospect list you may lawfully contact.
Managed Amazon SES is for transactional email only. Use your own provider for marketing, newsletters, or bulk promotional sends.

Do you need a domain for cold email?

No. You do not add or verify a domain in Sendmux when you send through your own accounts. Each account already authenticates for its own domain at its own provider, so Sendmux hands the message to that provider and the provider signs it.
One failure mode is worth knowing. If the managed account is the only eligible provider for a send and the sender domain is not verified, Sendmux rejects the message and records it in Logs rather than returning a bounce.

Set up cold outreach in Sendmux

1

Add your cold email accounts

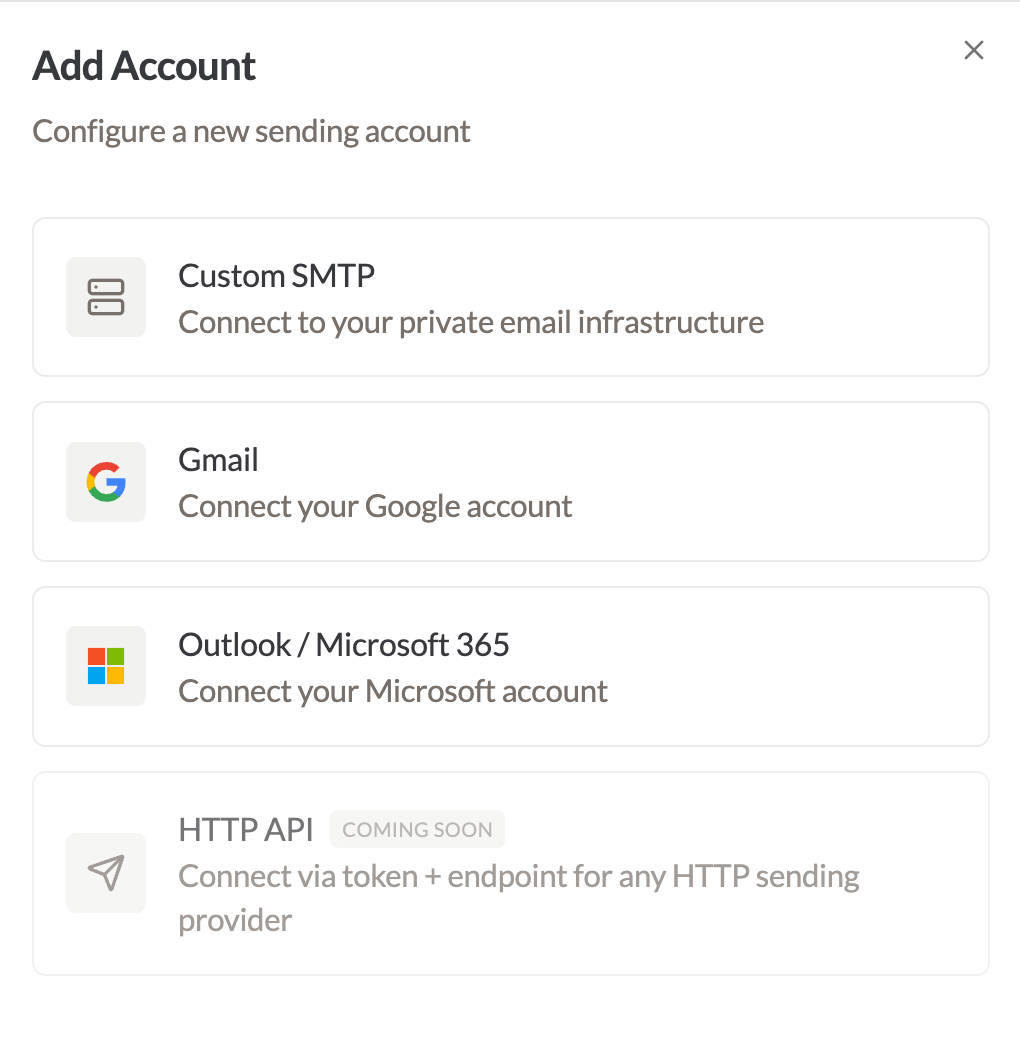
Open Accounts and select Add Account, then choose Custom SMTP, Gmail, or Outlook / Microsoft 365. Run Test Connection on SMTP accounts before you route real traffic through them.Any inbox provider that gives you SMTP credentials works as a Custom SMTP account, including Mission Inbox, ScaledMail, Zapmail, and others. There is no vendor-specific connector for these. You supply the host, port, username, and password, and Sendmux treats the account like any other.
The Sendmux Add Account panel showing Custom SMTP, Gmail and Outlook connection types

Choose the connection type when you add a sending account.
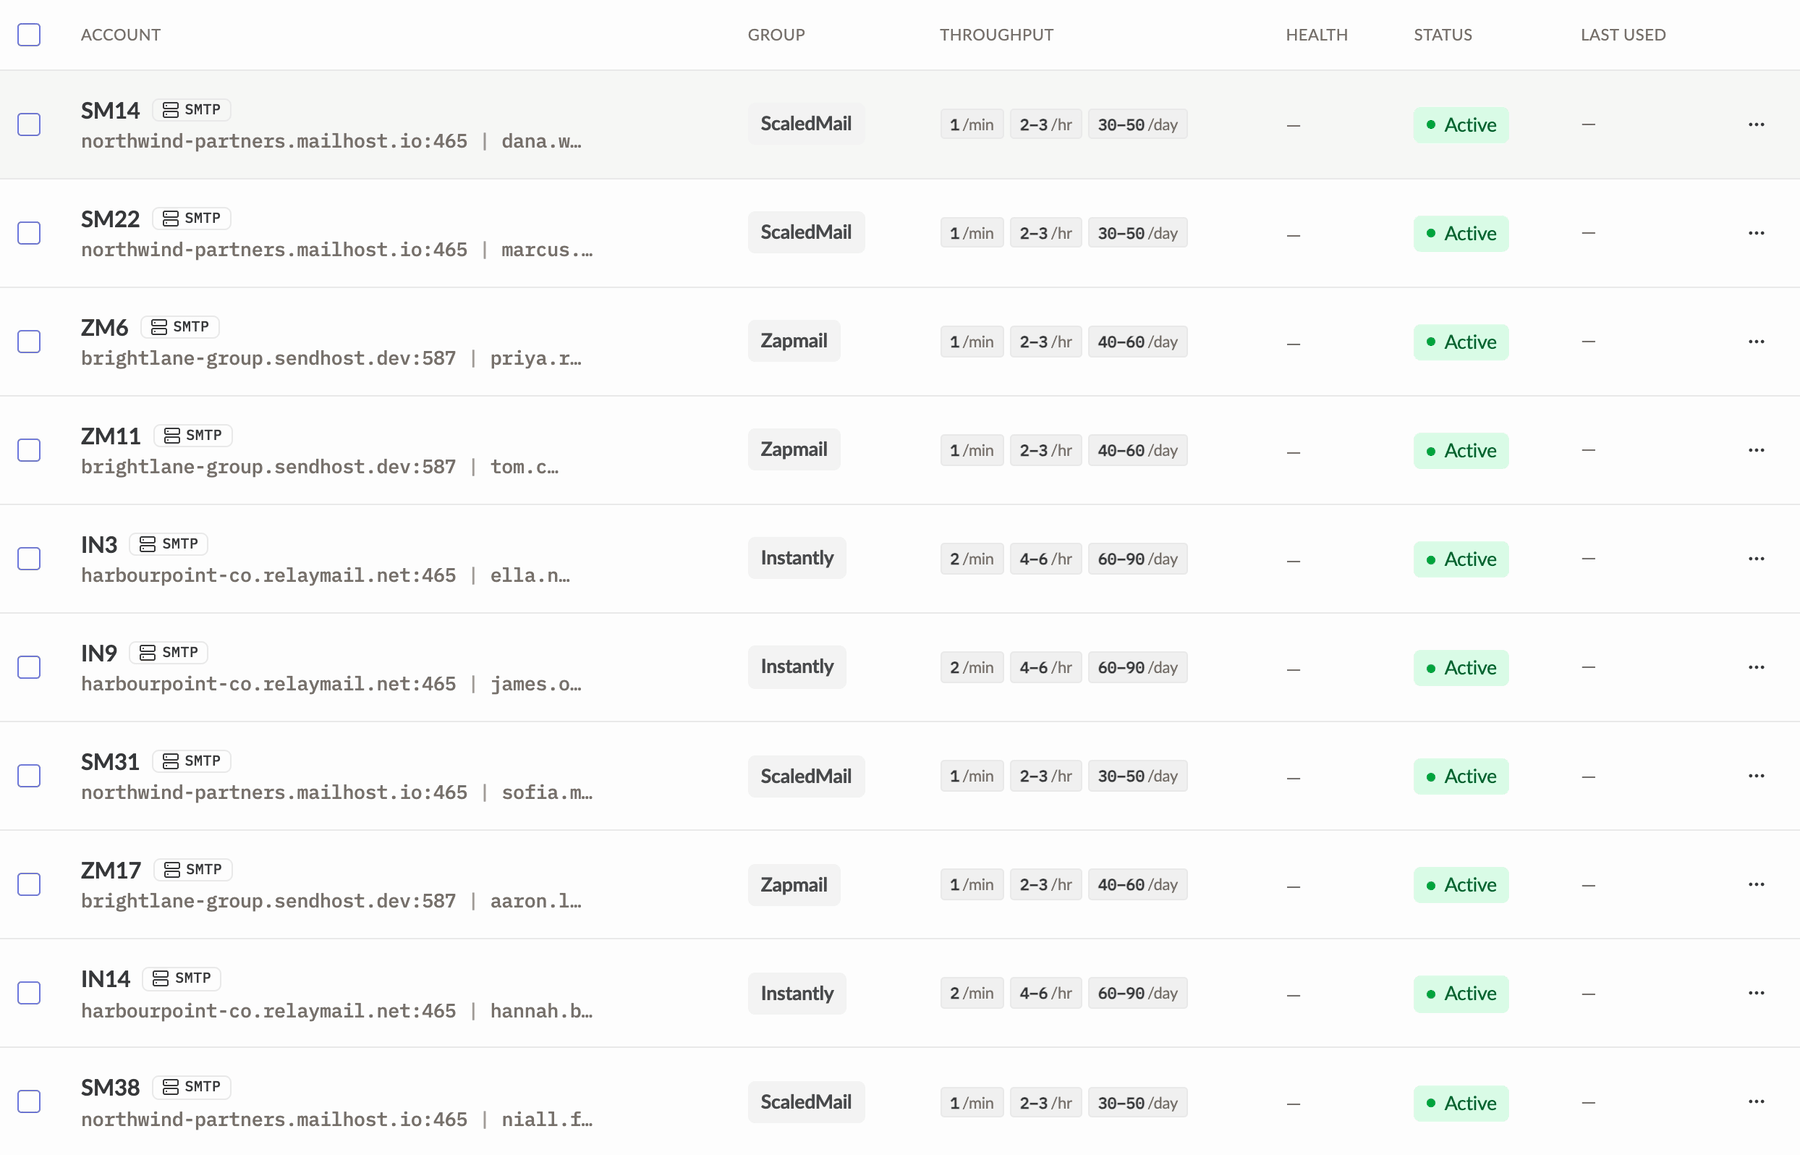
Running a pool of inboxes? Use Import Accounts with the CSV template instead of adding them one at a time. See Import accounts from a file.
The Sendmux Accounts table listing several SMTP sending accounts with their delivery group, throughput caps and status

A pool of inboxes, each with its own delivery group and per-minute, per-hour and per-day caps.
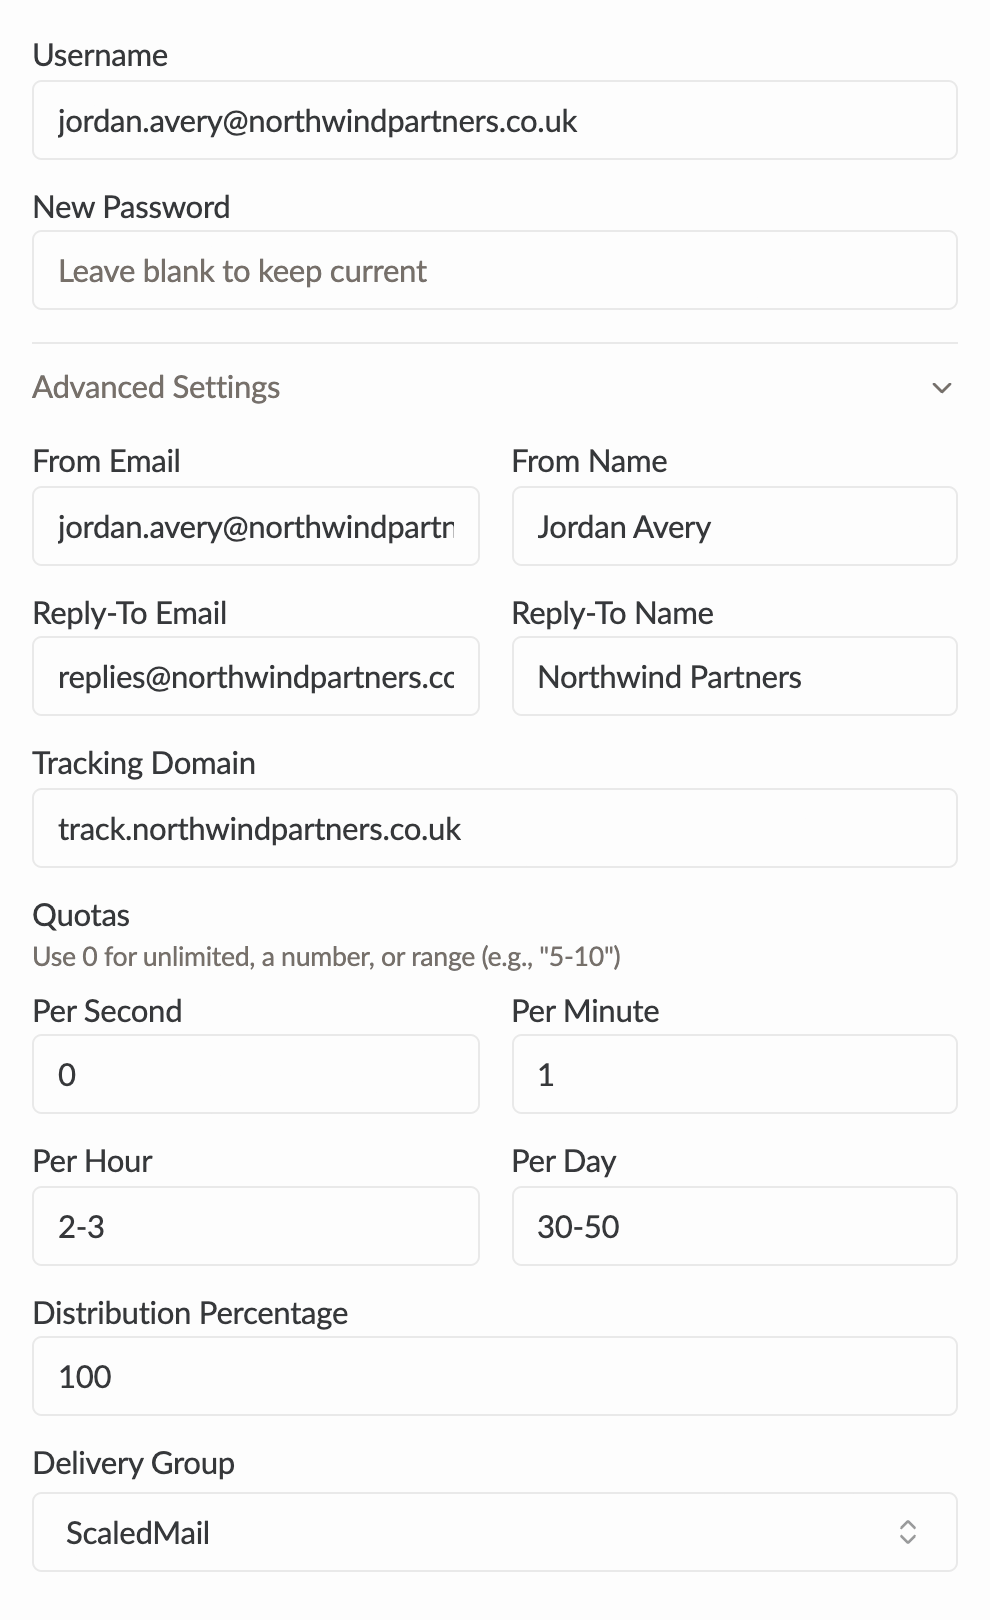
Then set the per-account details that make a pool behave like separate senders:
Advanced settings for one Sendmux sending account showing From Email, From Name, Reply-To, quotas, distribution percentage and delivery group

Advanced settings hold the sender identity, the caps and the routing weight for one account.

Full reference: Add your own account and Advanced settings.
2

Pick how you will send

Your sending route decides which credential you need, so choose before you create anything.Sending through more than one route is fine. Create a key for the routes that need one and authorise MCP separately.
3

Create a sending key, for SMTP and HTTP
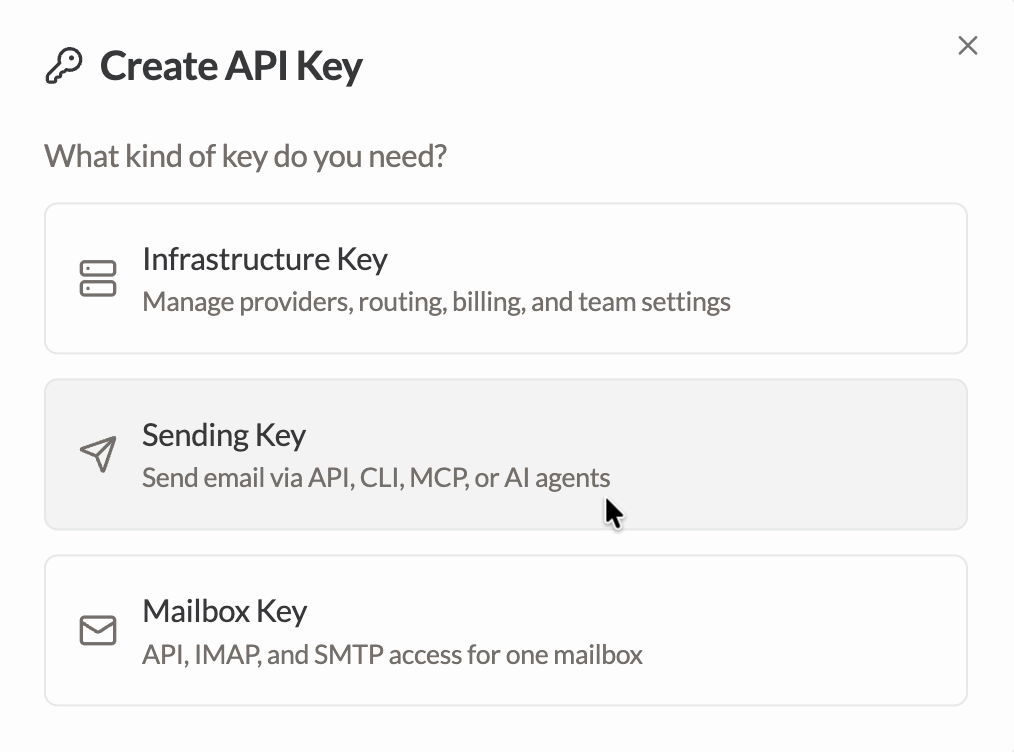
Skip this step if you only plan to send over hosted MCP.Open API Keys, select Create API Key, and choose the Sending key type. Pick whether the key routes through all providers, selected providers, or a delivery group.
The Sendmux Create API Key dialog with Infrastructure Key, Sending Key and Mailbox Key options, with Sending Key selected

Choose Sending Key. It covers the API, the CLI, MCP and AI agents.

Copy the smx_mbx_ value straight into your secrets manager. It is shown once. See Create a key and Key types.Then send:
  • SMTP. Host smtp.sendmux.ai, port 587 with STARTTLS, password is your sending key. See Sending by SMTP.
  • HTTP. POST to the Sending API. See Sending by HTTP.
4

Or connect an AI client over MCP

Hosted MCP authorises a connected app and issues its own short-lived tokens. It does not use a sending key, and connected apps never create smx_mbx_ secrets. See Connected apps and the next section.
Contact only people you have a lawful basis to email. Say who you are, keep the message relevant to the recipient, honour every suppression record, and give people a clear way to stop hearing from you.

Run your GTM motion from an AI tool

Connect Sendmux to Claude or another MCP client and your agent can send through the same accounts, with the same caps, without you pasting a key into it.
1

Add the server

Add https://mcp.sendmux.ai/mcp in your client. Per-client instructions are in Hosted OAuth clients.
2

Authorise the connection

Sendmux asks you to pick a team, then which product lines the app may use.
3

Check the tools appear

Confirm the sending tools are listed. See Verify the connection.
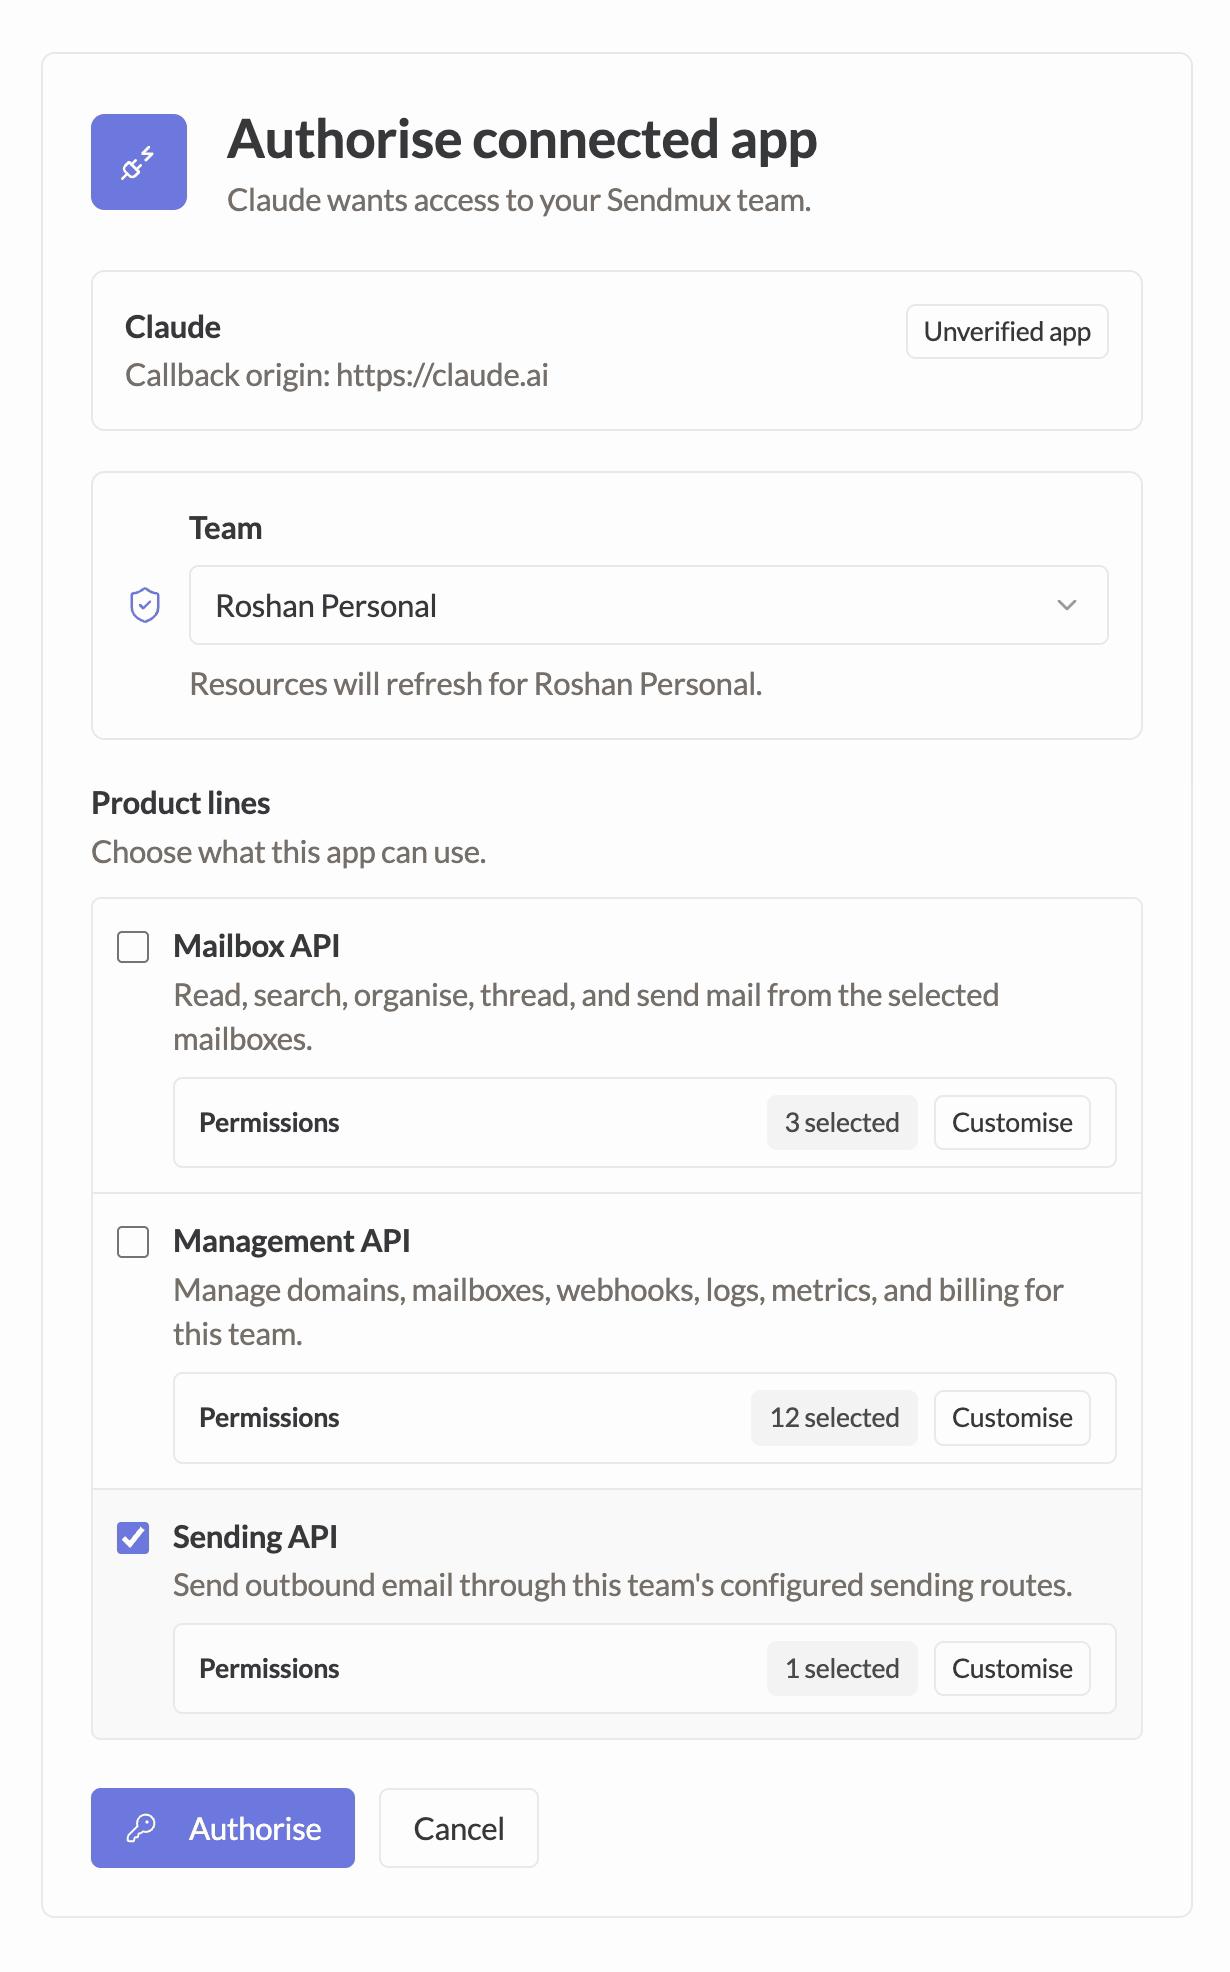
Grant Sending API only. Every product line is ticked when the authorisation screen opens. Untick Mailbox API and Management API so Sending API is the only one left. A Sending-only grant never asks you to choose mailboxes, and you do not need to create one. Add Mailbox API later if you also want the agent to read replies.
The Sendmux authorise connected app screen with Mailbox API and Management API unticked and Sending API ticked

Under Product lines, leave Sending API ticked and clear the other two.

For what each surface covers and how long tokens last, see MCP.

What each part does

Keeping the boundary clear saves a lot of debugging later.

Choose fixed caps or ranges

Use a fixed cap when you want one predictable ceiling per account. Use a range when you would rather the ceiling move inside boundaries you set. Sendmux picks a value when account information refreshes and holds that cap until the next refresh. A range varies the ceiling. It does not add a delay between individual messages, and it does not guarantee inbox placement. Targeting, authenticated sender domains, message quality, and account history all still decide what happens after Sendmux hands the message over.

Spread sends across several inboxes

Distribution percentage weights traffic between accounts that are eligible for the same send. Delivery groups go further and keep a stream of traffic on a chosen subset of accounts. The key you authenticate with decides which applies. See How routing works.
Put each campaign, or each customer, on its own delivery group. One inbox going bad then affects that group and nothing else.

Add replies later

Replies land wherever the Reply-To on each account points, which by default is the inbox provider you own. Nothing in Sendmux is required for that. You only need a Sendmux domain and mailbox when you want replies inside Sendmux, so an agent can read and act on them. That is also when the Mailbox API grant becomes worth adding to your MCP connection. See Domain management and Mailboxes.

Check before your first campaign

  • Every account tested and active.
  • From, Reply-To, and caps reviewed on each account, not just the first one.
  • Sending key stored in a secrets manager and scoped to the right providers, if you send over SMTP or HTTP.
  • MCP grant limited to Sending API, unless you deliberately want mailbox access.
  • Prospect sourcing, suppression, and opt-out handling settled.
  • The opening message and every follow-up read end to end.
Start small. Read the logs, watch bounces and complaints, then raise volume.

Common questions

No, not when you send through your own accounts. Each account authenticates at its own provider. A verified domain in Sendmux is needed only for the managed account, or to receive mail.
Any provider that gives you SMTP credentials, plus Gmail and Outlook or Microsoft 365 through the connected-account flow. Cold email inbox providers such as Mission Inbox, ScaledMail, and Zapmail connect as Custom SMTP accounts.
No. A Sending-only grant does not ask you to choose a mailbox, and you do not need to create one. Add the Mailbox API product line only when you want an agent to read replies.
Each team starts with 200 accounts you add yourself. The managed account does not count towards that. See Account limits and Default limits.
No. Managed Amazon SES is for transactional email only. Cold outreach, marketing, and bulk promotional sending must go through accounts you own.
Open Logs. You can filter by status, account, and recipient, and export the result. See Filter logs.

Sending accounts

Add accounts and set sender defaults, caps, and routing.

API keys

Create, scope, rotate, and revoke the key your outreach tool uses.

MCP clients

Connect Claude and other AI clients to your sending accounts.

Deliverability

Watch bounce rates, complaint rates, and account health.