Domain Verification Email: DNS, DKIM, and DMARC for Developers

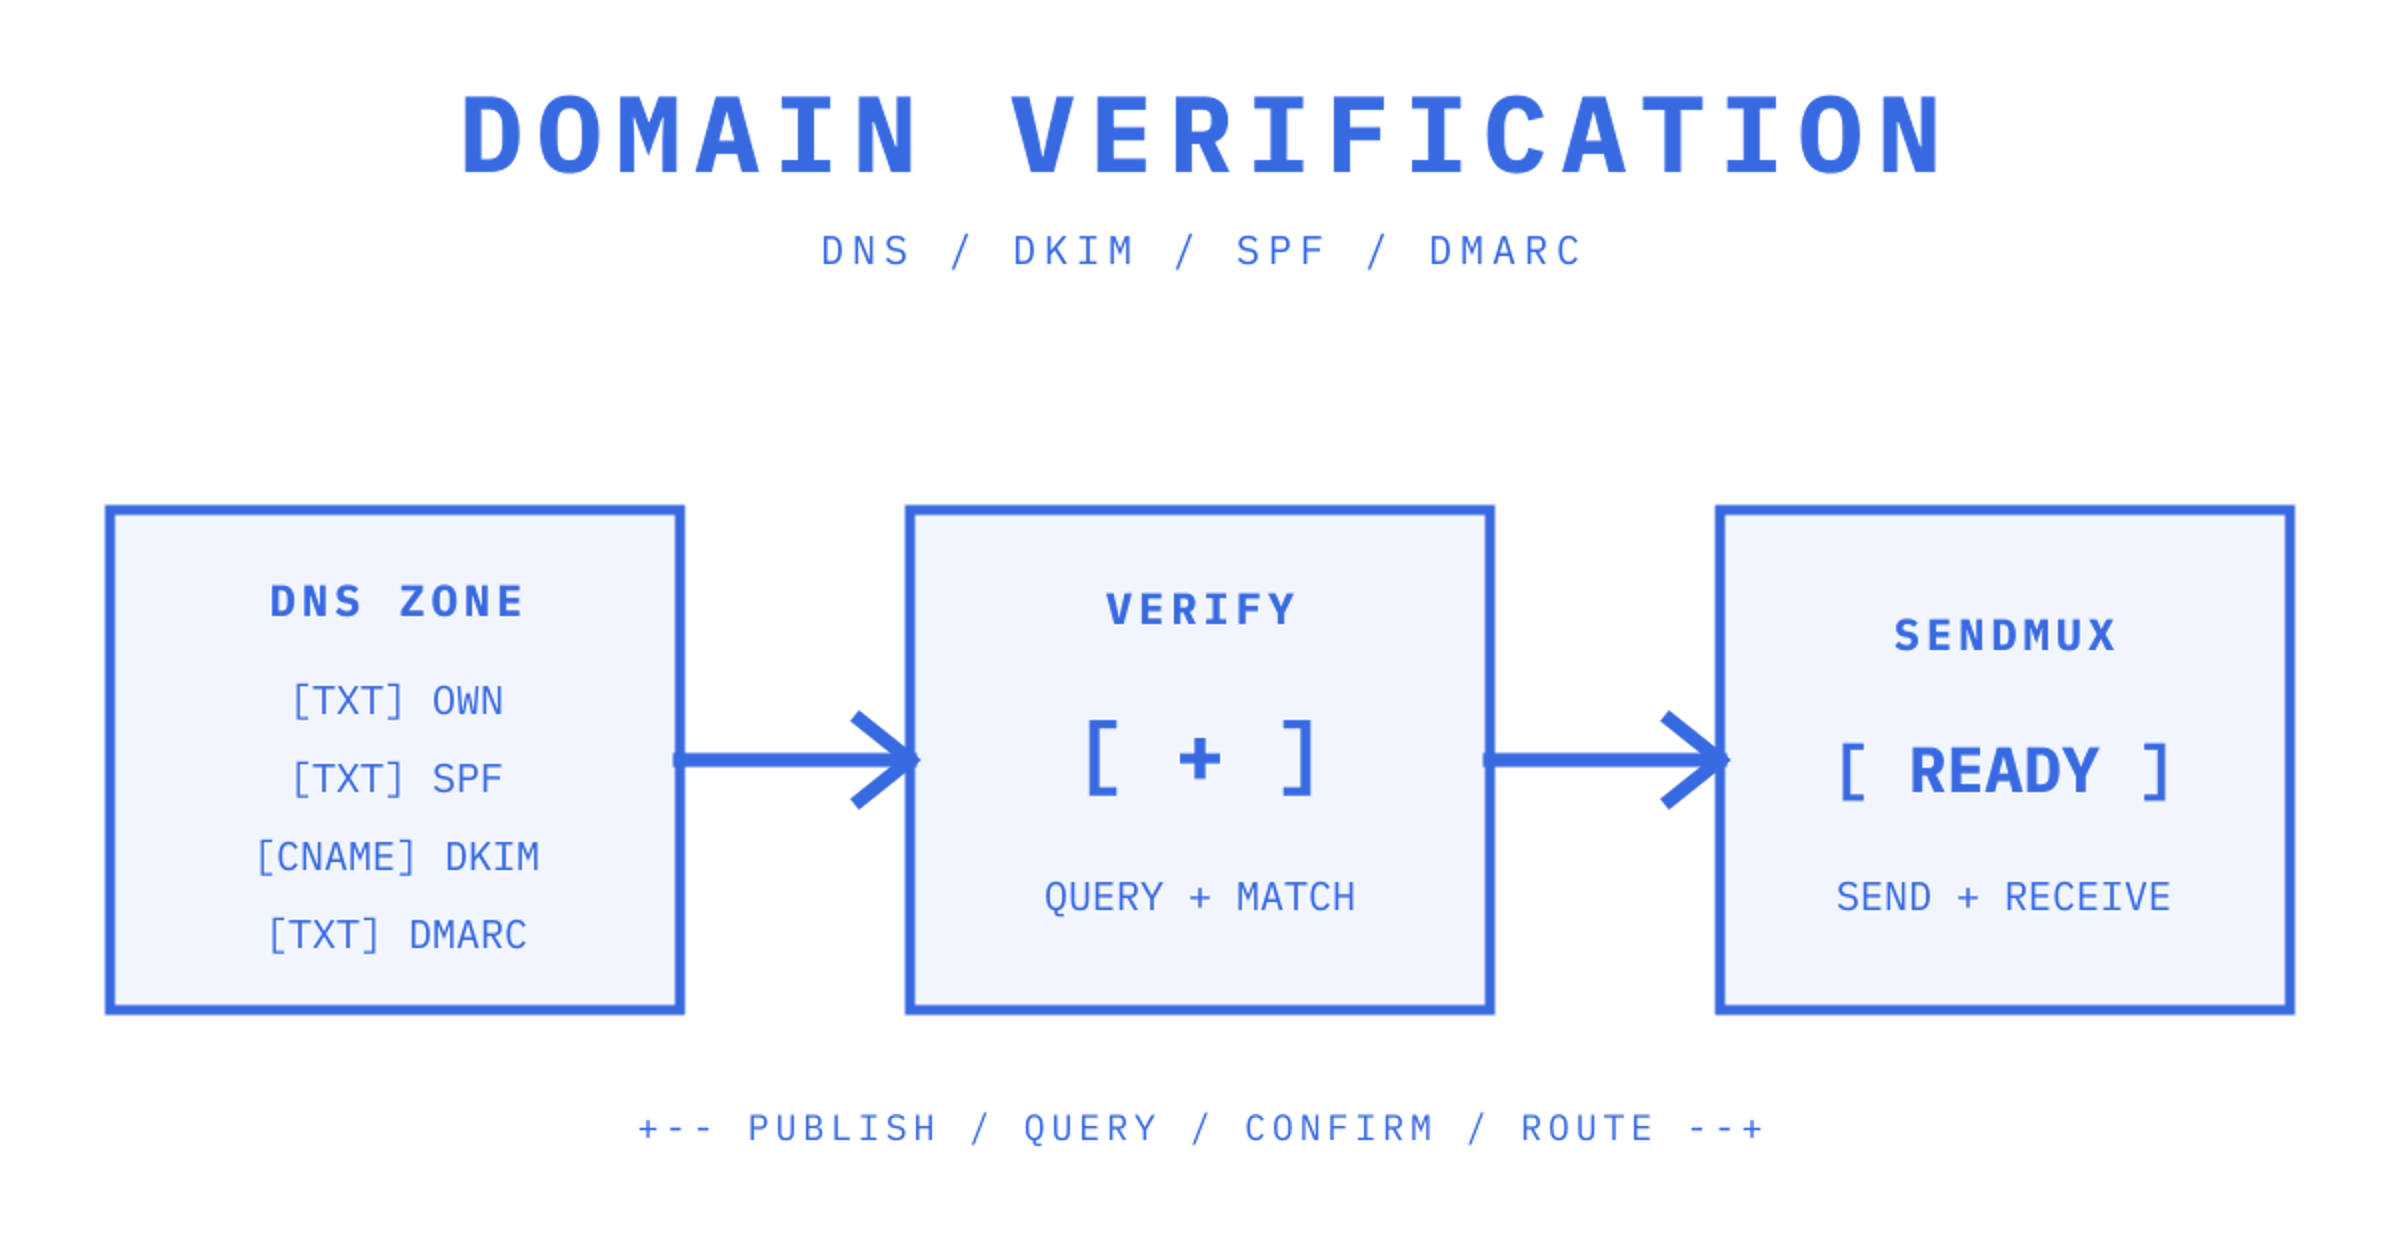
When you verify the email-sending domain you use for outbound mail, you might need to add the provider’s TXT verification record to your domain’s DNS, or add its DKIM selector records. Before you send mail at volume, check that SPF, DKIM, and DMARC are configured and working. This is also true when setting up a transactional API, an AI agent mailbox, or a bulk-sending pipeline.
This guide explains how to verify domain email configuration without mixing the separate ownership and authentication checks. The best email domain verification method is the one documented by the sending provider. You should copy the exact records, publish them to the expected names, and confirm each result independently.
Here’s a basic DNS checklist for most programmatic setups:
- Verification TXT record — provider-supplied token at
@or a specified subdomain, such as_sendmux-verification.example.com
- DKIM selector record — selector._domainkey.example.com as a CNAME for a provider-hosted key or TXT for a self-published public key
- SPF TXT record — at the provider-specified domain, authorising your sending IPs and providers
- DMARC TXT record — at
_dmarc.example.com, with a policy and, when you want aggregate feedback, anruareporting address
Quick rule of thumb: Use DNS TXT verification if you control the domain's DNS and the provider issues an ownership token. Set up DKIM if the provider requires signing. If the service supports email validation and you do not have (or have limited) access to DNS, use the emailed domain verification link.
Key Takeaways
To verify an email-sending domain, your provider will have you demonstrate control using the record type it specifies. After demonstrating control, you will check DKIM, SPF, and DMARC separately. The complete domain verification process keeps ownership confirmation, message signing, sender authorisation, and policy enforcement separate.
| Point | Details |
|---|---|
| Publish the provider's complete record set | A provider may require an ownership TXT record, DKIM selectors, SPF, DMARC, or additional bounce-handling records. Copy the exact set it supplies. |
| Stage DMARC enforcement | Current DMARC guidance recommends monitoring at p=none for at least one month, then comparing an equally long p=quarantine period before considering p=reject. |
| Test before you verify | Query an authoritative nameserver directly with dig to confirm records exist before triggering provider verification. |
| Rotate DKIM keys safely | Publish the new selector, wait out the existing DNS TTL, switch signing, and retain the old key until messages signed with it no longer need validation. |
| Sendmux automates the checks | Sendmux exposes the required ownership, SPF, DKIM, DMARC, and bounce-handling records through its Management API, supports on-demand verification, and rechecks domains every six hours. |
What domain verification email methods should you use?
Domain authentication email offers multiple verification options. Taking the wrong option can waste time and leave signing incomplete. DNSimple's DNS records reference contains a helpful summary of record types, while your provider's current instructions are the final word on the exact names and values.
| Method | Record(s) to add | Scope | Timing | Pros | Cons |
|---|---|---|---|---|---|
| DNS TXT ownership token | TXT at @ or a provider subdomain | Provider-defined domain | Depends on DNS TTL and provider checks | No mailbox needed; automatable | Requires DNS access; some providers recheck the token |
| DKIM configuration | CNAME or TXT at selector._domainkey | Messages signed with that selector | Depends on DNS TTL and provider checks | Enables cryptographic signing; a CNAME can let the provider manage public-key publication | A wrong selector or value prevents verification |
| Email validation | None; the service sends email to an approved address | Service-defined address or domain | Depends on email delivery and token lifetime | Works when the service supports it and DNS access is unavailable | Requires a working mailbox and human action; tokens can expire |
Programmatic setups tend to use DNS TXT verification. A unique value is assigned by the provider and you publish it as a TXT record. The provider queries the DNS to confirm control of the domain. For some providers, the token may need to remain published. Unless the documentation allows it, the token should not be removed.
DKIM configuration shows that mail can be signed for a domain. The service might ask you to publish CNAME records that point to the public keys they host, or a TXT record that holds the public key for a private key that you control. A CNAME record delegates public-key publication to the provider, while BYODKIM keeps the signing key under your control.
Some products support email validation when DNS access is restricted or controlled by a third party. An example is AWS Certificate Manager's email validation, which sends emails to five specific administrative email addresses, and each validation token expires after 72 hours. DNS-validated ACM certificates can renew automatically while the required CNAME remains available; email-validated certificates require owner action at renewal.
Only use email validation for domains when expressly allowed by the service. Just because a mailbox process can verify email address ownership does not mean you have DNS control over the entire sending domain.
How do you publish a DNS TXT verification record?
A record has three main fields: Name/Host, the location of the record; Value, the exact verification token; and TTL, the time resolvers are allowed to cache the response. These are the basic domain verification steps for a TXT challenge.
Common field values
- Name/Host:
@for a zone apex when the provider requests it, or a label such as_provider-verify
- Value: the exact string supplied by the provider, such as
provider-verification=abc123xyz
- TTL: use the provider's recommended value or your DNS host's default; a shorter TTL shortens future cache lifetimes but does not purge records already cached under an older TTL
Adding the record in common DNS panels
- Cloudflare: Open DNS > Records > Add record. Choose TXT, enter the provider-supplied name and content, and select an allowed TTL. Cloudflare's email records guide explains the related DNS records for email.
- Route 53: Open the hosted zone and create a TXT record at the required name. Route 53 represents each TXT string inside double quotation marks; its console and API documentation show how to split values longer than 255 characters into quoted chunks within one record.
- GoDaddy: Open the domain's DNS records and add a TXT record. Use
@only when the provider requires the zone apex; for a named challenge, enter the host label in the format GoDaddy expects. Select an available TTL rather than assuming a universal value.
Confirming the record from the command line
dig +short TXT example.com
nslookup -type=TXT example.com
Query the exact record name the provider gave you. If the expected string is not there, then either the name/value is wrong, the authoritative nameserver has not been updated, or a recursive resolver still has a cached response.
Common mistakes to avoid:
- Appending the root domain to the Name field in a panel that already appends it
- Changing punctuation, spacing, case, or quoting inside the provider-supplied value
- Removing a token that the provider periodically rechecks
- Publishing multiple policy records where a protocol requires one record
Pro Tip: Before pressing Verify on a provider dashboard, query the authoritative nameserver for the exact DNS record. Using a public resolver, like 8.8.8.8, will show you whether the record is recursively visible, but its cached response can lag behind the authoritative server.
When setting up domain email, capture the authoritative nameserver response separately from the provider's status. The provider may be waiting for its next check, even though your DNS may already be correct.
How does DKIM work, and what records do you need?
DKIM (DomainKeys Identified Mail) enables outgoing emails to include a digital signature. The public key is accessed by a receiving server, and the server checks the integrity of the signature and if the signed components of the message were altered during transit. The DNS entry for this key is selector._domainkey.example.com, where selector corresponds to the key.
CNAME vs. TXT: which approach applies to you?
Services like Amazon SES may use CNAME records that link to a provider-controlled DKIM Public Key. This enables the provider to handle DKIM Public Key changes without forcing a DNS change. In contrast, a self-published TXT record means that you post the public key and keep the private key.
Self-published TXT records can look like this:
Name:  mail2026._domainkey.example.com
Type:  TXT
Value: v=DKIM1; k=rsa; p=MIIBIjANBgkqhkiG9w0BAQEFAAOCAQ8AMIIBCgKCAQEA...
The p= field has the public key, which has been base64 encoded. DNS restricts each label to 63 octets in length, and the full domain name (in wire format) must be 255 octets or fewer (including the terminating root label and length octets). A long DKIM key in a TXT record may be split across multiple quoted character-strings within a single TXT resource record.
Key length and rotation
- 1024-bit RSA keys meet the DKIM interoperability minimum but should not be the default for a new deployment when the provider and DNS host support 2048 bits.
- 2048-bit RSA keys are the recommended choice in current Google Workspace and Salesforce setup guidance, and Amazon SES uses 2048 bits by default for Easy DKIM.
- Rotation: generate the new key pair, publish a new selector, confirm it through DNS, switch the signer, keep the old public key available while old signatures can still be evaluated, and remove it only after that overlap window.
Pro Tip: Instead of assuming a 48-hour wait time, account for the selector's previous TTL and the expected time for your message to travel when determining your overlap. Check the new selector from an authoritative nameserver before signing with it.
How do SPF and DMARC complete the authentication stack?
SPF, DKIM, and DMARC collaborate but verify different identifiers. Proofpoint's authentication guide gives a practical overview, while the current rules for SPF, DKIM, and DMARC are defined in their respective RFCs. SPF authorises hosts for an envelope domain. DKIM checks and validates domain signatures, and DMARC checks that at least one result passes and aligns with the visible author domain.
SPF record structure
v=spf1 include:_spf.google.com include:amazonses.com ip4:203.0.113.10 ~all
Publish the policy that your active senders require. SPF implementations count DNS-querying terms—include, a, mx, ptr, exists, and redirect—even in recursive evaluations, and must return permerror if the total exceeds 10. The mechanisms all, ip4, and ip6 do not count that way.
SPF best practices:
- Keep one SPF policy record at each owner name; multiple SPF records at one name produce
permerror
- Remove providers you no longer authorise and retain every active sender's required mechanism
- Use a dedicated sending subdomain when you need separate policy and reputation boundaries
- Do not replace provider-managed
include:mechanisms with copied IP ranges unless the provider explicitly supports that configuration
DMARC record for monitoring
_dmarc.example.com TXT "v=DMARC1; p=none; rua=mailto:dmarc-reports@example.com; sp=none; adkim=r; aspf=r"
At p=none, a domain doesn't state a DMARC-specific handling preference for failing messages, although it can receive rua aggregate reports. DMARC recommendations say that data should be collected with p=none for at least one month. There should then be an equally long comparison with p=quarantine data before p=reject is considered. This should be done especially when legitimate emails can pass through intermediaries, such as mailing lists.
The alignment trap most teams miss
DMARC passes when either SPF or DKIM passes and aligns with the visible From: domain. Under default relaxed alignment, the authenticated domain can be different from the author domain, as long as they are in the same organisational domain. Under strict alignment, they must be identical. This means that, in some cases, SPF and DKIM can pass individually while DMARC can fail. This can occur when neither passing identifier aligns. For SPF, the relevant authenticated identity is the MAIL FROM domain.
If a third-party sender uses its own return-path, set up DKIM signing to use your domain or a supported aligned identity. Do not diagnose alignment using exact string comparison unless the DMARC record requests strict alignment.
How do you verify and test DNS and authentication after publishing?
The first part is about publishing records, and the second is about validation of each layer prior to allowing live traffic. Query the exact ownership, DKIM, SPF, and DMARC names, then analyse an actual test email.
dig NS example.com
dig @ns1.example.com TXT example.com
dig @ns1.example.com CNAME mail2026._domainkey.example.com
dig @ns1.example.com TXT _dmarc.example.com
DNSimple's quick reference lists common email-related DNS records. After sending a test message, inspect the Authentication-Results header in the received message. A passing stack can look like:
Authentication-Results: mx.example.com;
  spf=pass smtp.mailfrom=example.com;
  dkim=pass header.d=example.com header.s=mail2026;
  dmarc=pass header.from=example.com
In the event of dmarc=fail, analyse the DMARC record's alignment mode. This is true even if there is a passing SPF or DKIM result. This compares the authenticated domain with the visible author domain. A provider dashboard's domain verification notice may aggregate these checks. Still, the underlying state is shown in DNS answers and the received-message header.
Recommended tools: Direct access to DNS answers is granted by the dig and nslookup commands. Header analysers can make the Authentication-Results field easier to read, and validators can flag syntax mistakes in SPF or DMARC. Every recommendation should be checked against the applicable RFC and provider documentation. These tools can be of use but must be cross-checked against the documentation.
Why aren't your DNS records showing up yet?
DNS updates do not have a single global time for propagation. Authoritative servers may be able to update in a timely manner. Recursive resolvers will continue to serve the older answer until the TTL expires. A provider may also check on its own set timetable after public DNS is prepared.
Stepwise troubleshooting
- Query an authoritative nameserver directly. Find it with
dig NS example.com, then rundig @ns1.example.com TXT example.com. If the record appears there but not through a recursive resolver, inspect the prior TTL and cached answer.
- Check for duplicate SPF records. Run
dig +short TXT example.comand count strings beginning withv=spf1. More than one SPF record at the owner name is a protocol error.
- Verify the Name field. If a panel appends the zone, entering
_dmarc.example.comcan create_dmarc.example.com.example.com. Use the format documented by that host.
- Check for CNAME conflicts. A CNAME owner name cannot coexist with other data. Zone-apex SPF and DMARC therefore use TXT records, not CNAME records.
- Confirm delegation. Query the domain's NS records and make changes at the DNS host those records identify, not merely at the registrar.
- Check provider-specific CNAME handling. Keep email-authentication CNAME records DNS-only where a DNS host offers HTTP proxying, and follow the sending provider's exact name/value format.
- Account for TTL caching. Lowering TTL affects answers cached after the change; it does not shorten the lifetime of an older cached answer.
These verification checks are important for email domain verification since a green ownership check does not confirm that DKIM, SPF, or DMARC is correct. Each signal should be viewed separately.
Provider-specific notes for Amazon SES, ACM, Google Workspace, and Salesforce
Different providers have their own processes and documentation for domain ownership confirmation and signing. Do not try to construct a template using similar records from another account—rely on the current primary documentation for your provider.
Amazon SES views identities as resources that are regional. If you must send an email from a domain in multiple AWS Regions, you need to create and verify an identity in each Region, unless you deliberately use the documented Deterministic Easy DKIM replica workflow. Easy DKIM generates three CNAME records, and SES uses 2048-bit keys by default. However, BYODKIM accepts 1024- to 2048-bit RSA private keys.
AWS Certificate Manager (ACM) offers two validation pathways for public certificates: either DNS or email validation. DNS validation uses a CNAME record, validating ownership and automating renewal while the certificate is in use and the record is publicly available. Email validation sends links to five common administrative addresses. Its token expires after 72 hours, and renewal requires owner action.
Google Workspace differentiates between domain ownership and DKIM signing. First you verify the Workspace domain by using the unique google-site-verification= TXT value, and afterwards you go to Apps > Google Workspace > Gmail > Authenticate email to generate and publish the DKIM record and then select Start authentication. Google recommends 2048-bit keys if your DNS host supports them.
Every organisation, including sandboxes, must verify email-sending domains for Salesforce. Domain verification is satisfied when the domain of an active DKIM key matches the entire From domain. In DKIM Keys, create both primary and alternate selectors, publish the two generated CNAME records, and then wait for Salesforce to detect them before activating the key. The alternate selector will be used by Salesforce for automatic key rotation.
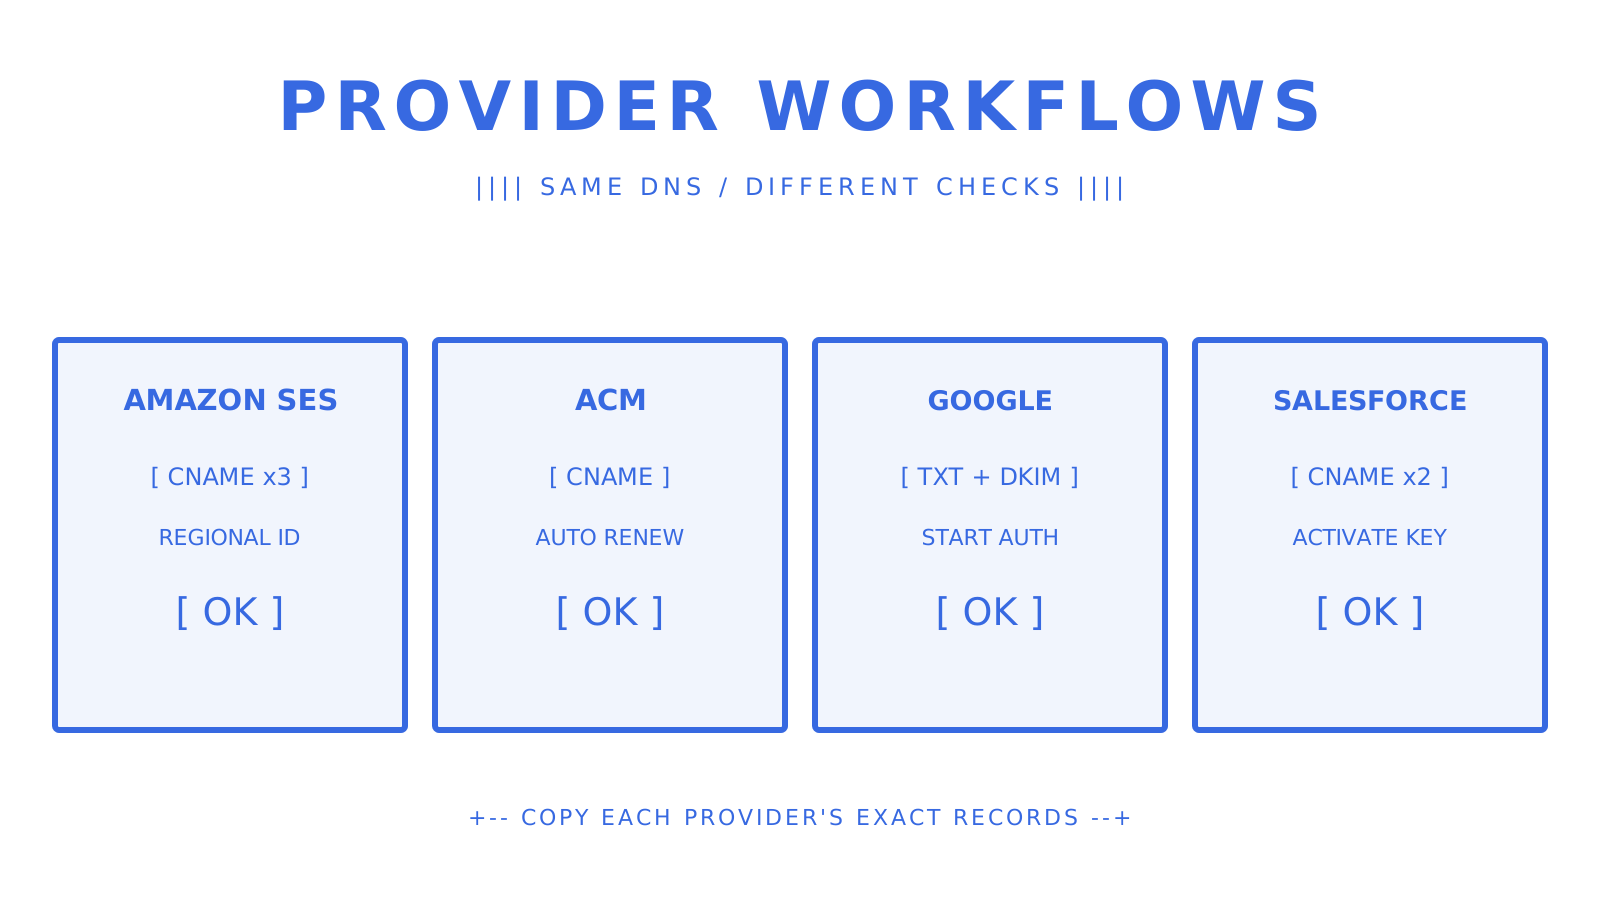
Original ASCII comparison of the distinct Amazon SES, ACM, Google Workspace, and Salesforce verification flows.
Operational security: key rotation, revocation, and limiting exposure
A verification record and DKIM key control policy should describe how ownership tokens will be managed. Ownership tokens should be retained only for the time needed by the provider. Signing keys should be overlapped and rotated, and provider authorisations should be removed if the provider is no longer used.
DKIM key rotation maintains validation by using two selectors. Publish the new public key, then confirm both the authoritative and the recursive answers. Change the signing to the new selector and leave the old selector in place for the evaluation of previously signed messages. The old key may be removed after the overlap period.
Changing providers requires that there is overlap, as opposed to a verification gap. The old provider should be removed only after the necessary records for the new provider are published and verified. The single SPF policy should be adjusted to remove obsolete authorisation and add the new supported mechanism. Old DKIM selectors may be retired only after the new signing path is confirmed.
Subdomain isolation can differentiate authorisation and reputation. A third-party sender can use a separate subdomain, such as mail.example.com or bounce.example.com, with its own aligned identifiers and provider records. This also provides for more precise revocation in the future. However, DMARC alignment must be configured correctly.
Pro Tip: DMARC aggregate-report ingestion should be implemented with the policy set to p=none. This will help identify authorised and unauthorised sources before enforcement. Consider the report data to be operational information and keep it secure. Use a parser that supports the current aggregate-report format.
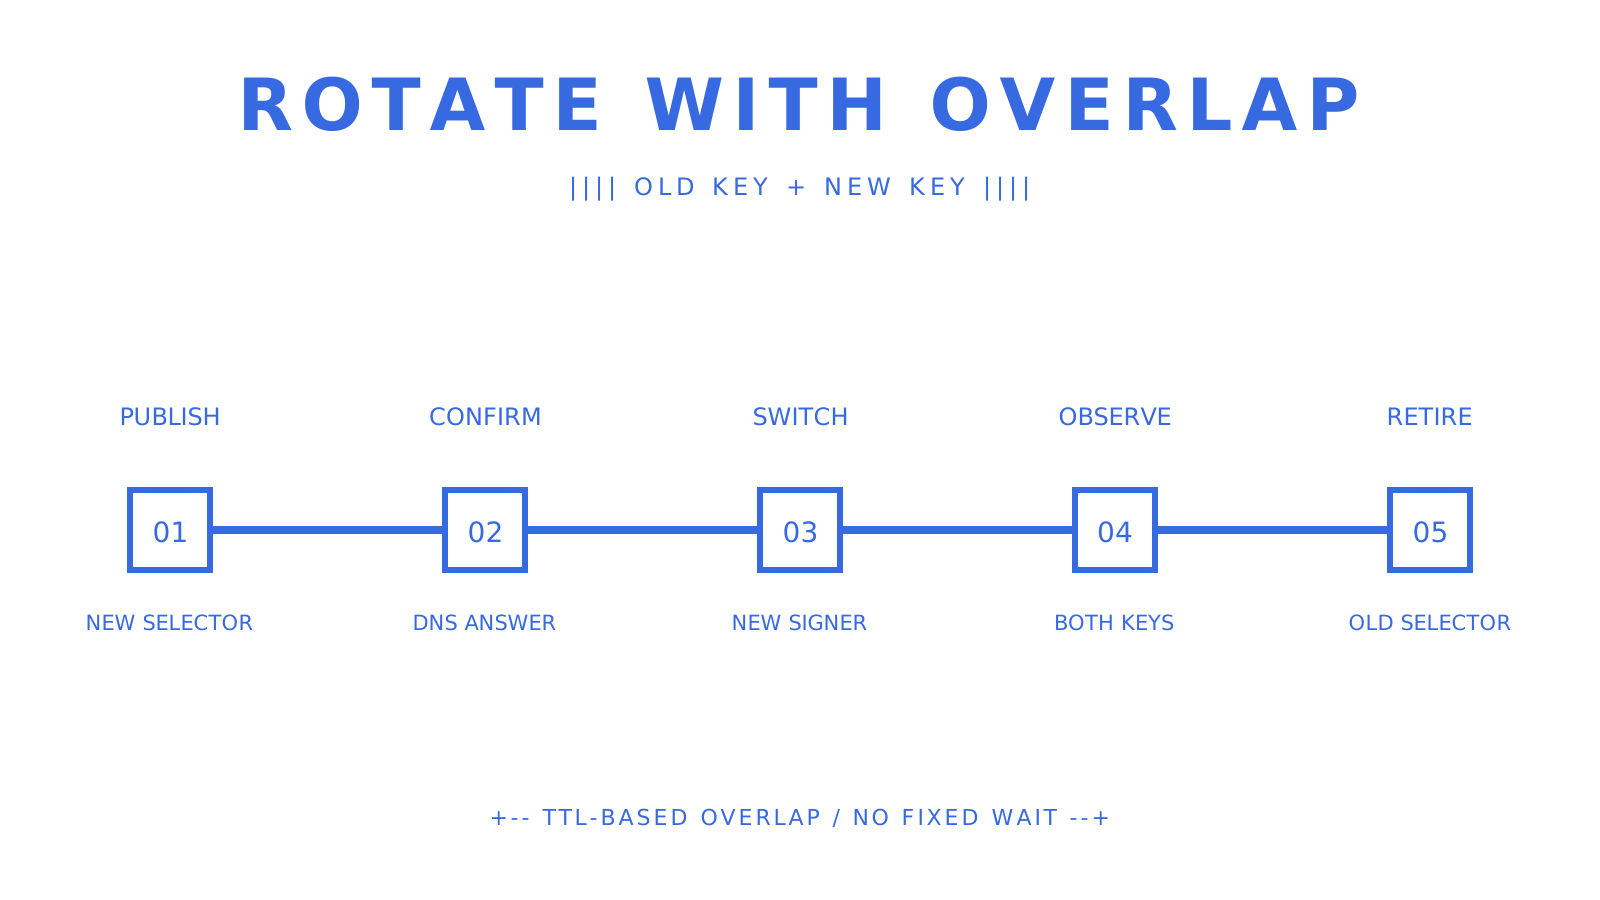
Original ASCII sequence showing publish, confirm, switch, observe, and retire steps.
What I actually do before pushing to p=quarantine
For at least one month, I set DMARC to p=none to collect DMARC aggregate reports. I enable DKIM signing, and I publish provider records. I find every legitimate sending source, and I fix all failed authentications and forwarding or mailing-list traffic before I apply any other DMARC policy adjustments.
I apply p=quarantine for a comparison period equal to the p=none period. I consider p=reject only after this comparison period. I determine that each legitimate source has at least one aligned passing identifier. DKIM is often the more durable path through forwarding, but a DMARC pass requires only one aligned SPF or DKIM result.
The Management API supports the domain verification process at Sendmux. It returns the ownership, SPF, DKIM, DMARC, and bounce-handling records and exposes their verification state. Sendmux supports an on-demand verification request and automatically rechecks domains every six hours. A deployment pipeline can check the verification state before routing live traffic.
Sendmux handles domain verification so you can focus on sending
When you have multiple providers, regions and subdomains, performing an SPF DKIM DMARC setup becomes complicated. Sendmux consolidates custom-domain records and verification status and allows you to observe provider routing and message delivery.
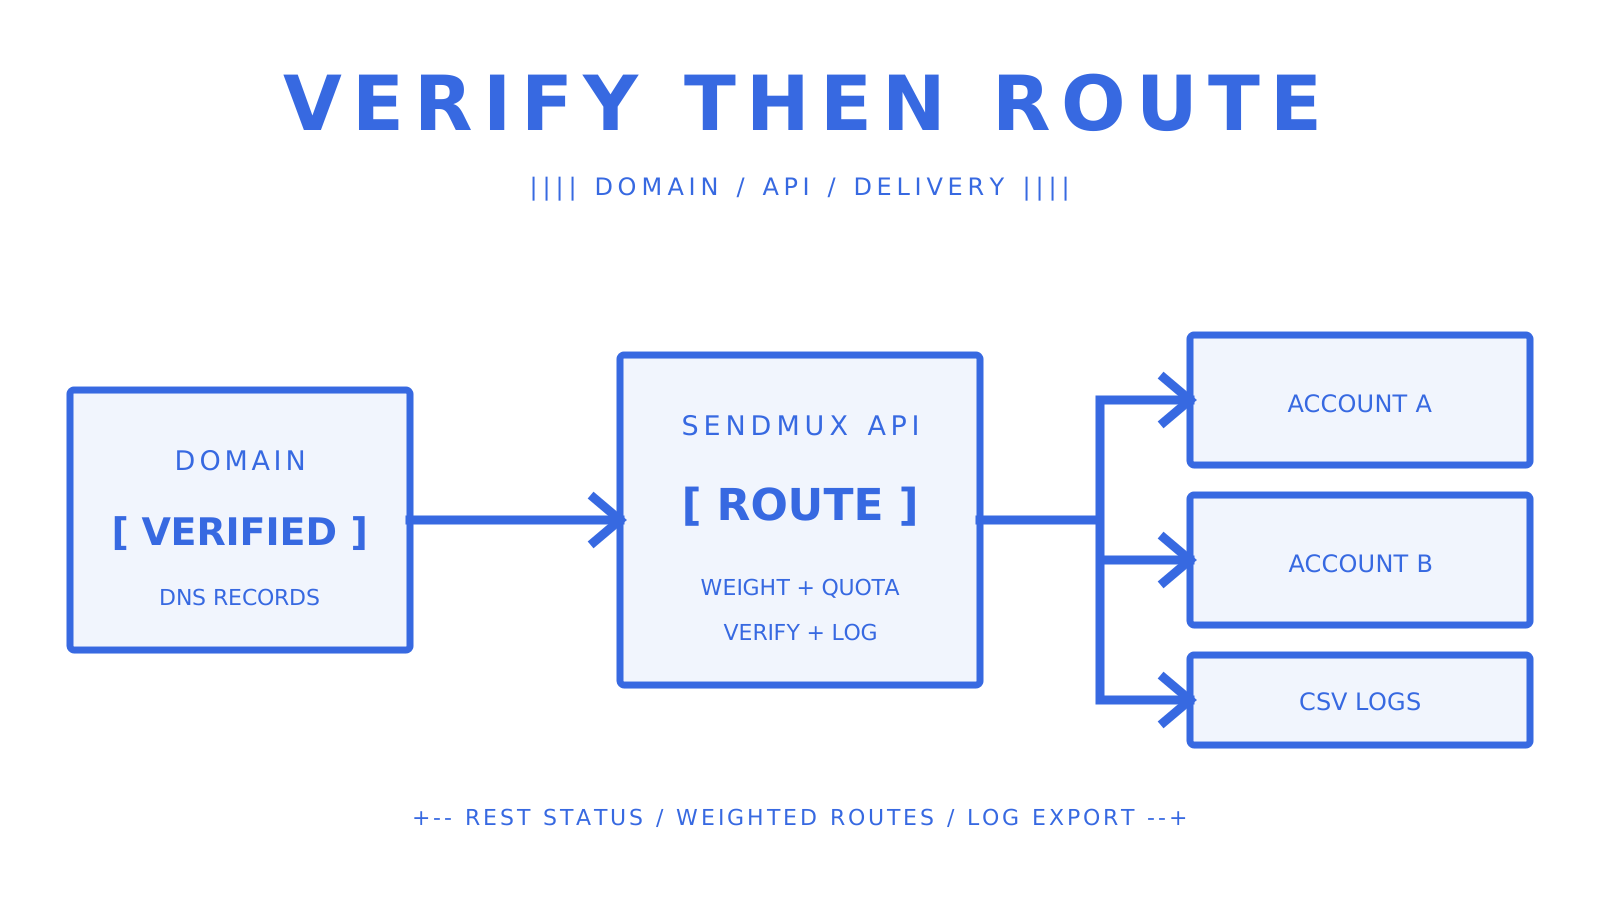
Original ASCII view of verified domain records feeding Sendmux sending routes.
For developers building on Sendmux, the current workflow includes:
- Programmatic verification status via REST — the Management API can list domain DNS records and status, then trigger an on-demand ownership, SPF, DKIM, DMARC, and bounce-handling check
- Weighted sending accounts and failover — configured SMTP, Gmail API, Outlook API, and managed Amazon SES accounts expose routing weights and quota windows; the sending path can try another available account when the selected account is unavailable
- Delivery logs and CSV export — the Management API lists message-level logs, and the dashboard exports filtered rows as CSV; Sendmux does not provide DMARC aggregate-report ingestion
The public APIs are covered by TypeScript, Python, Go, PHP, Ruby, and Rust SDKs. The verification workflow can be found in the domain management documentation. You can use a shared @myagent.mx mailbox without custom DNS. Move to a verified custom domain when you need branded sending.
When comparing email domain verification options, the importance of domain verification is practical email security. Ownership checks prevent unauthorised configuration changes. SPF, DKIM, and DMARC give receivers evidence about the messages themselves. Retain the exact provider records and final verification state in your deployment evidence.
Sources
These references cover record syntax, provider-specific steps, and operational DMARC guidance:
The wording for setting up domain email can obscure distinct controls. Retain each provider-issued value byte-for-byte. Make every email validation for domains decision from that provider's current documentation, not a standard template.
Frequently Asked Questions
What are the primary methods for verifying an email-sending domain?
The primary methods for verifying an email-sending domain typically involve adding a DNS TXT verification record with a provider-supplied token, configuring DKIM selector records (either CNAME for provider-hosted keys or TXT for self-published public keys), or using email validation if DNS access is limited and the service supports it.
What is the difference between DNS TXT verification and DKIM configuration?
DNS TXT verification is used to prove ownership of a domain by publishing a unique token supplied by the provider in a TXT record. DKIM configuration, on the other hand, involves publishing records (CNAME or TXT) that allow receiving servers to cryptographically verify the authenticity and integrity of emails sent from your domain.
How do SPF, DKIM, and DMARC work together to authenticate emails?
SPF (Sender Policy Framework) authorizes specific IP addresses or domains to send emails on behalf of your domain. DKIM (DomainKeys Identified Mail) digitally signs outgoing emails, allowing recipients to verify the message's integrity and sender. DMARC (Domain-based Message Authentication, Reporting, and Conformance) builds on SPF and DKIM by specifying policies for how receiving servers should handle emails that fail authentication, and provides reporting on these failures.
What is the recommended process for staging DMARC enforcement?
Current DMARC guidance recommends starting with a 'p=none' policy for at least one month to monitor reports without affecting email delivery. After this, transition to 'p=quarantine' for an equally long period to allow failing emails to be quarantined. Only after careful analysis of these stages should 'p=reject' be considered, especially if legitimate emails might pass through intermediaries.
What are some common mistakes to avoid when publishing DNS records for email verification?
Common mistakes include appending the root domain in DNS panels that already do so, changing punctuation, spacing, case, or quoting within the provider-supplied value, removing a token that the provider periodically rechecks, and publishing multiple policy records where a protocol requires only one (e.g., multiple SPF records).
When should I use a CNAME record versus a TXT record for DKIM?
You should use a CNAME record for DKIM if your provider offers 'Easy DKIM' or a similar service, as it allows the provider to manage public-key changes without requiring you to update your DNS. A TXT record is used when you self-publish the public key, giving you more control over the key but requiring manual updates for key rotation.
